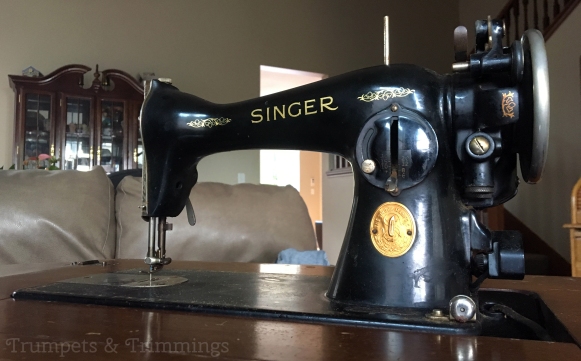
She’s a 1934, model 15-91 Singer.

And she’s beautiful!
I found her tucked away in the back of a Goodwill (thrift shop) for $99 where she had been mislabeled an “end table.” I snatched her right up (and even got half off the price at the register) and prayed that the piece of tape that said “still runs” was true.
When I was cleaning her and giving her a tune-up, I relied heavily on some really great blog posts that gave tips and pointers. I’ll link some of them at the bottom, but I’m also going to go through what work I did on Frankie in the hopes that my experiences will help at least one person out there that has a ’34 Singer of their own to work on.


To begin, this is the shape I brought her home in. Dusty and stained with age, but all the parts were there and there wasn’t any major damage. Plus the decals were in pretty good shape, too!

These were the products I used for cleaning:
- Compressed air
- Flitz Polish (metal/plastic/fiberglass polish)
- Sewing machine oil (Singer brand)
- Pledge (furniture polish)
- Microfiber cloths
- Water + dish soap
- Cotton swabs
- Steel wool
- Gun-cleaning cloth (infused with “rust and lead remover”)
The first thing I did was gently spray dust out of the interior of the machine, out of the cabinet, and then lightly dust off the cobwebs with the microfiber cloth.
After that, the real work began.
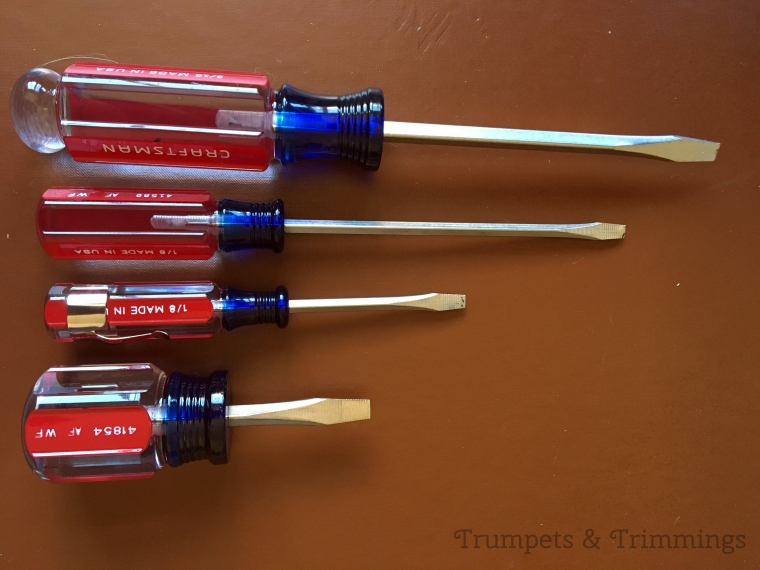
Using a flathead screwdriver (lots of different sizes help), I took the metallic parts of the machine off one piece at a time and cleaned them.

Steel wool + elbow grease took off most of the rust and grime, except for some deep pits. Then a good polish with the Flitz restored a lot of the shine.
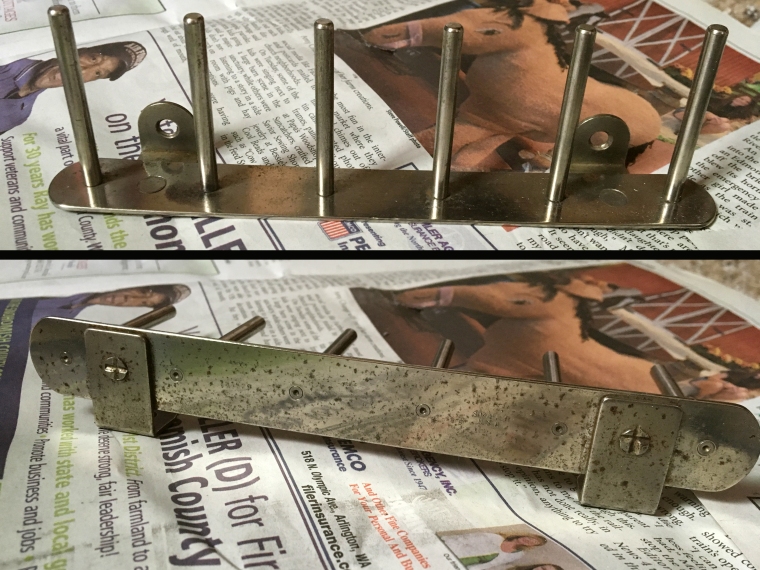
The two-step process worked really well on all of the silver metal parts, even the decorative plates.


For less-shiny pieces, like the feet, I used just steel wool.
The steel wool got the rust and grime off and didn’t aggravate the areas where the plating had worn off from use.
For the black body of the machine, a.k.a. the non-mental parts (which I learned is called japanning), I followed the advice of the tutorials I’d read and used mild dish soap + water to get the grime off. I tried out the gun-cleaning cloth, but it didn’t blow me away so I stuck with the suggested few drops of sewing machine oil to polish it and bring back most of the shine while leaving the decals intact. Cotton swabs worked very well for getting in the nooks and crannies. Just be careful not to rub too hard or you’ll take off the gold.
The basic mechanics of the machine are surprisingly straightforward. If you’re nervous about fiddling around with the inside, don’t be! It makes a lot of sense once you slow down and take a look.
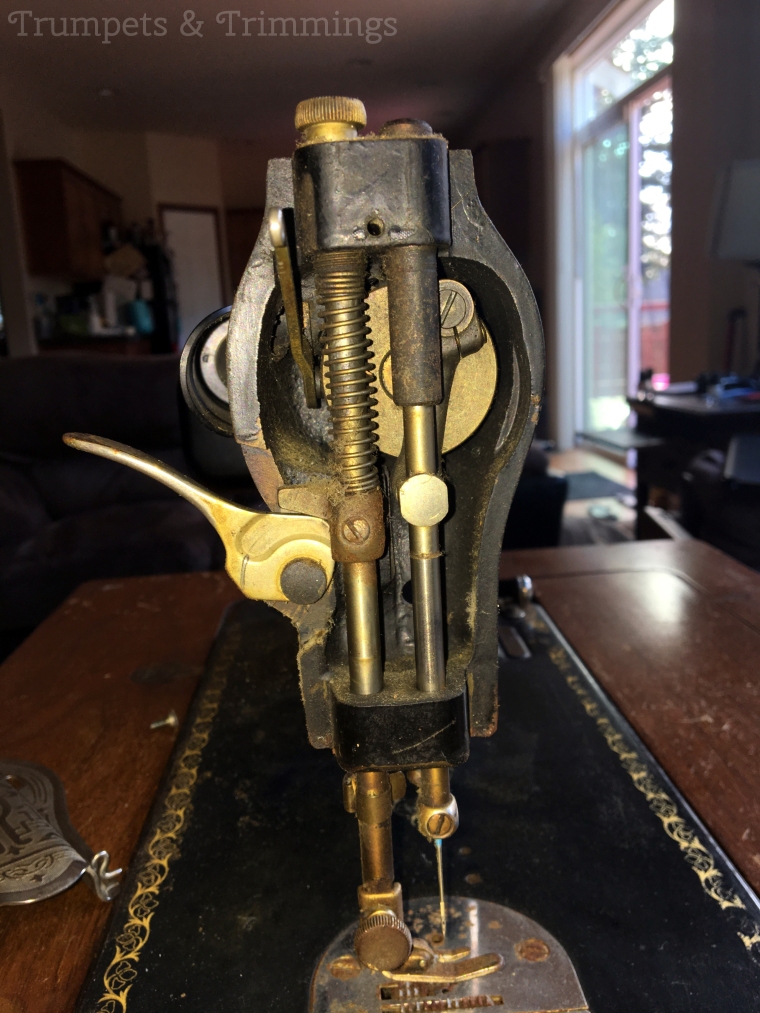
My machine had an issue with the presser foot – it wouldn’t raise or lower when I moved the lever on the back. Opening it up, I applied some penetrating oil where the presser bar (the one on the left) goes through by the body of the machine and waited half an hour. It didn’t help; the foot still didn’t budge.
So, at the advice of my father, I placed a brass screw-type-shape thing (it’s apparently softer metal, so it won’t ding anything) on top of the bar and tapped it lightly with a hammer until it freed. Then I worked some sewing machine oil into the joints and it’s moved freely since then!
The next step was to oil all of the moving parts machine with sewing machine oil at the suggestion of the original manual (see the bottom of the post).

That whole thing was the dirtiest part of the whole job!
At this point I plugged the machine in and held my breath, hoping that it would go.
Well, it went…very, very slowly.
The first thing I looked at was the pedal. I opened it up, following a really helpful guide I found online (see bottom of post for link), and found that there was a small brass piece missing and another piece had been inserted backwards to compensate for it. The piece was like a nut, but it also apparently completed the electrical circuit inside the pedal itself.
I started looking at pedals to buy online so I could get a replacement part, but my dad had the idea to open up the “extra” motor that was mounted inside the cabinet that was attached to the knee pedal. Sure enough, it had the missing part inside! Since I don’t plan on ever using the knee pedal (the wires are badly frayed) I swapped it over to the foot pedal and gave it another try.
It still ran extremely slowly.
So it was time to take a closer look at the electrical guts of the machine.

One of the features of this model was that it offered a built-on motor, apparently called a “potted motor,” instead of a separate one that sat at the back on the base. If you take the cover off, this is what it looks like – I was very scared to touch it.
But I had to figure out why it sewed so slowly.
I found an original troubleshooting guide online (see bottom of post) and started going through step by step taking the motor slowly apart to make sure all of the pieces were working okay. All of the wiring looked perfect, so it was difficult to figure out.

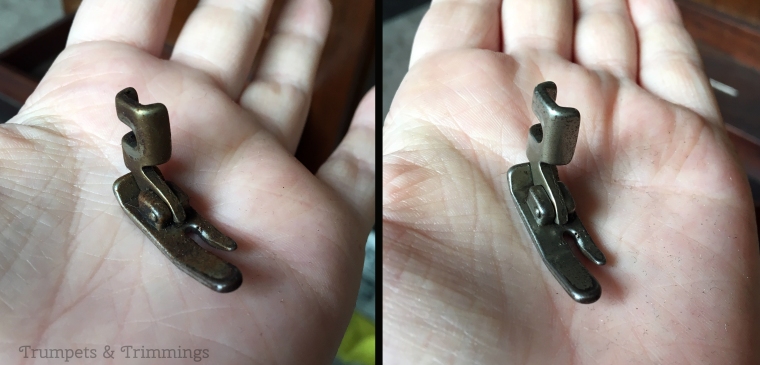
One of their suggestions was to take out the brushes (one on top and one on bottom, under big, black screws) to make sure they’re still good. I got about this far and then took a break for the night. It was a lot of intricate work navigating around the motor (you even have to take off the wheel to get at the good parts) so I spent rest of the evening browsing the web for replacement motors, just in case.

Well, one of the things I noticed while browsing spare parts was that the new brushes (on the left, above) were square on the bottom. The ones in my machine were very curved (on the right, above). I had thought they had been designed like that on purpose, but the website got me thinking. I ordered two new ones for a much better price ($15.89, including shipping) than buying a new motor (~$80, not including shipping).

A few days later, I popped them in and gave it another whirl.
Success!
The machine runs perfectly now.
The brushes are needed to complete the electrical circuit, so the worn ones weren’t making enough constant contact to keep the machine going at its regular pace.
As for the cabinet, the top needed a lot of work. Apparently, it had been sitting a long time with a doily on top, and possibly some potted plants, judging by the circles where the finish came off.

I started by going over the whole thing with furniture polish. Much to my surprise, it took the dark shadow totally off the top. What I had thought was deep discoloration was actually just a thick layer of grime!
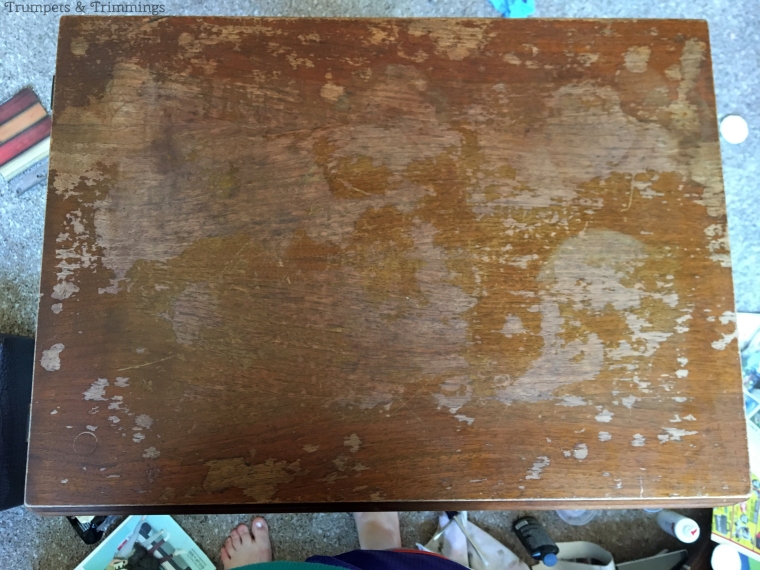
This is now it looks now. I’m still doing some research on what it takes to refinish the top, so it’ll stay like this for the time being. The wood is very soft.
The rest of the cabinet is in much better shape, save for some nicks and small water stains. I tried out a couple of wax/marker “furniture-fillers” but I couldn’t find a matching color so I didn’t go forward with any of the products I tried.
And that’s what I did to restore Frankie and get her into good working order.
So, on to some bonuses!
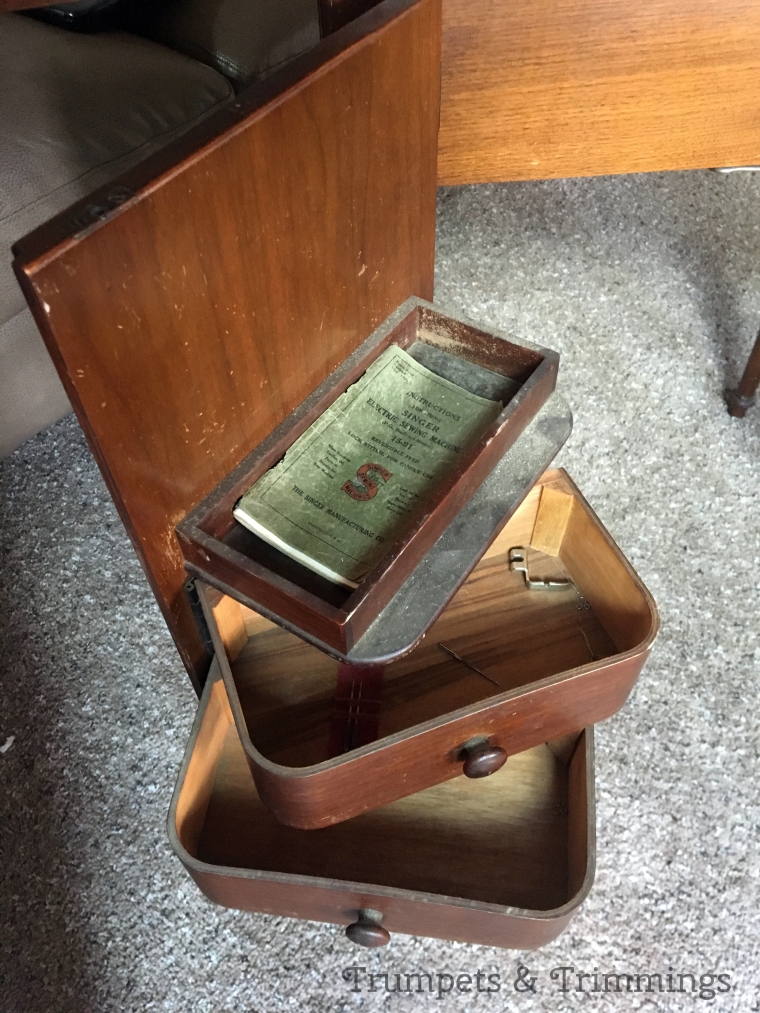
Inside the cabinet is a set of drawers for storage that held a few treasures. Namely, the original operating manual! Oh my gosh, I was so excited when I saw it. It was a real help to have on hand when I was oiling the machine and threading it.
There were also a couple more surprises in the drawer: a very skinny foot (zipper?), some machine needles, and spare pins.

Strapped in underneath is the original bottle of oil, still half-full.
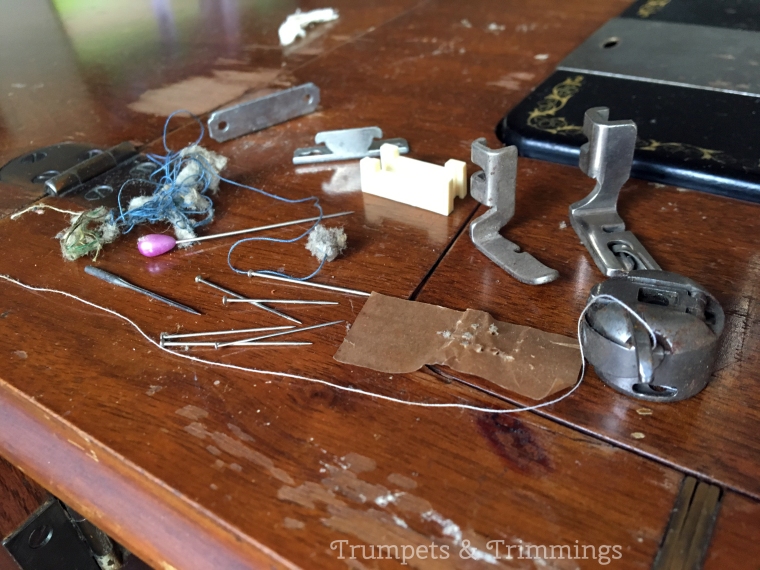
And I had even more of a surprise when I tilted the machine back to dust underneath it and found a lot more goodies inside! A couple more feet, more pins, needles, some scraps of old projects, and the bobbin case with a bobbin in it!

I don’t know what the previous owner was sewing, though, because there are half a dozen colors of thread wound on the bobbin.

Something I found amazing was how little the basic design of a sewing machine has changed in almost one hundred years. My modern-day bobbin is on the left and the 1930’s one is on the right in the picture above. The parts are so similar, in fact, that I’m able to use a modern-day bobbin in the vintage machine so I can leave the original intact with its myriad of threads.
And that’s it! It seems like a lot when I write it down, but it took only about a day and a half. I had a ton of fun working on it and definitely foresee more projects like this in the future!

This is what Frankie looks like now – all nice and shiny and running like a charm!

Now I get to pick out my first project to sew on her!
But, before I go, I promised to list some of the resources I found supremely helpful.
- 15-91 manual
- Cleaning guide I
- Cleaning Guide II
- Cleaning Guide III
- Fixing the pedal *** this blogger was extra helpful – she took the time to answer a question from me on this post that is, by now, several years old
- General servicing
- Reconditioning tips
- Adjuster’s manual/troubleshooting guide
- Where I bought the brushes from
If I think of any more, I’ll add them!

Doesn’t it give a great feeling to get these old beauties up and running again? They stitch so beautifully too. I had avoided buttonholes for most of my sewing life [40 years] until I got a buttonholer attachment for my straight-stitch Singer. A revelation! I can’t stop making shirts now!
LikeLike
Yes, it really does!! I cannot wait to try sewing a garment on her – seems like there’s nothing quite like a vintage machine. Attachments open up a whole new world, too!
LikeLiked by 1 person
The ones I find most wonderful are the buttonholer, the pintuck marker [first straight pintucks EVER, and the gathering foot [although mine has gone out of whack and I need to sort it out]. Everything else I don’t bother with, as there’s no benefit between the vintage and the new. The vintage ones are also just so BEAUTIFUL!
LikeLiked by 1 person
Those sound like such useful attachments to have! I’ve never been brave enough to try pintucks…maybe if I can get an attachment. I think I have a box of some vintage ones lying around somewhere…I wonder if they’re the right ones for my machine. Hope so! Now I want to go find it! Haha.
LikeLiked by 1 person
I never thought that a pintuck marker could cause such delight, but they’re GREAT. I’m not a very accurate sewer, preferring speed over neatness, but I made so many pretty, neat tucks with this clever gadget. There’s something about the ingenious mechanical nature of it that pleases me deeply!
LikeLike
Hi Frankie! He is a beauty! Good job on getting him to run again.
LikeLike
Thank you!! 🙂
LikeLike
Wow, it’s beautiful! I do really love old machines – a shop I worked at had a 1908 singer industrial that still worked perfectly. I loved thinking about all the people who’d used that machine for the past century. Tangible history is so cool!
LikeLike
Ooh, that machine sounds lovely! I totally agree that that’s one of the best parts of history – thinking about the real people who actually used the objects we collect now. So many stories they could tell…
LikeLike
Aahhhh this is my dream, to find an antique machine for a steal (heart eyes) (What KIND of antique is up for debate, but a hand-crank or treadle is definitely on the list) . I am SUPER Jealous and also SO VERY HAPPY for you, for this beautiful old gal (so many heart eyes, for real). Interesting that you can use a modern bobbin. My 1956 machine uses a flatter, wider bobbin that won’t work if its upside down, never mind a modern one D:
My modern machine has started making horrible clunking noises, and this has inspired me to get Beatrice out again 😀 Congrats on this beautiful find!
LikeLike
Hand-crank or treadle is definitely on my list too!! There’s just something about vintage machines (sigh). Fingers crossed that one comes along for you, too!! And soon!
I was surprised to see that the bobbins were exactly the same, except that the the 30’s one had slightly more square edges. Haha. Very minor difference. That’s interesting that your ’56 machine is so picky! That sounds like my modern machine, haha.
I hope your modern machine quits making those noises! They can be so picky and, at least for me, it’s hard to figure out what exactly is wrong with them. Love the straight-forwardness of the vintage machines!
LikeLike
I see you don’t monetize your website, don’t waste your traffic, you can earn additional bucks every month because you’ve got high quality content.
If you want to know how to make extra bucks,
search for: Boorfe’s tips best adsense alternative
LikeLike